Thursday, October 10, 2013

CC102 - Day 4

Awhile back I "attended" an Online Card Class that Tim Holtz had put together entitled Creative Chemistry 101. Well, he's back with the second installment, Creative Chemistry 102 (CC102). I love learning new techniques, and I love getting inky, so of course I signed up. What's nice about the Online Card Classes is that once you pay your tuition, you have lifetime access to the class, files, videos, etc. And if you participate during when the class is what I'll call "live", you can ask questions and interact with others taking the course. FUN!
 
We are not allowed to discuss the whys and wherefores of each days lesson, so I can simply post my creations and tell you what the technique is called. So here goes...


Tinted Tinsel


One thing to notice on this tag is that I colorized the leaf after having stamped it on acetate.
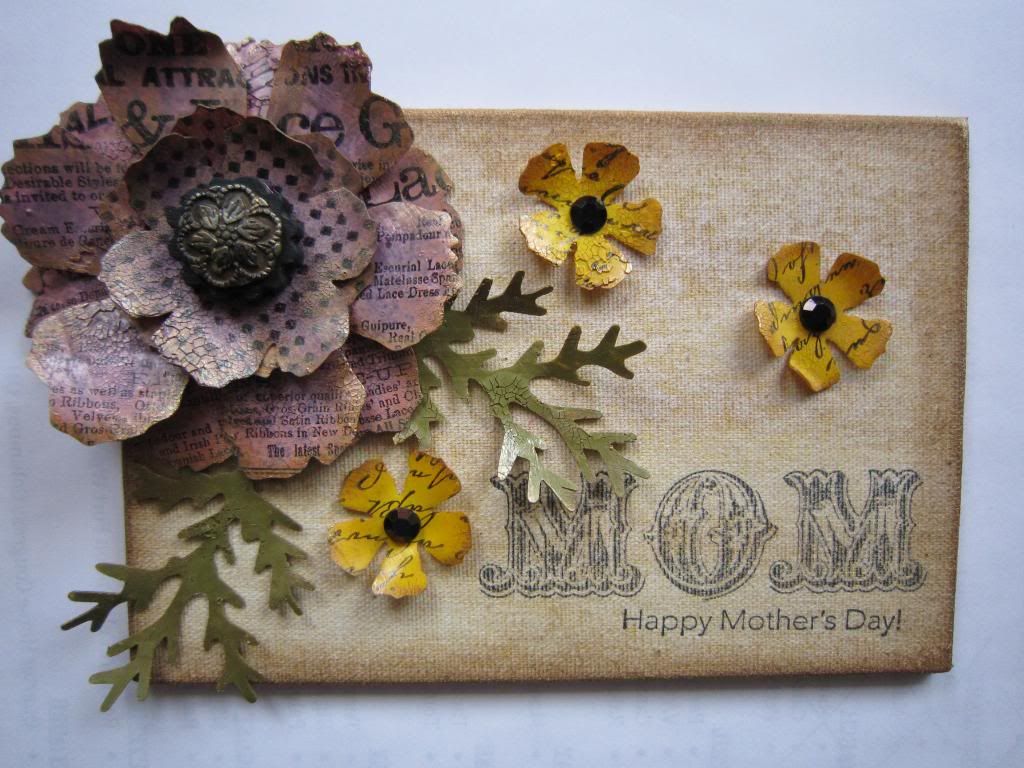
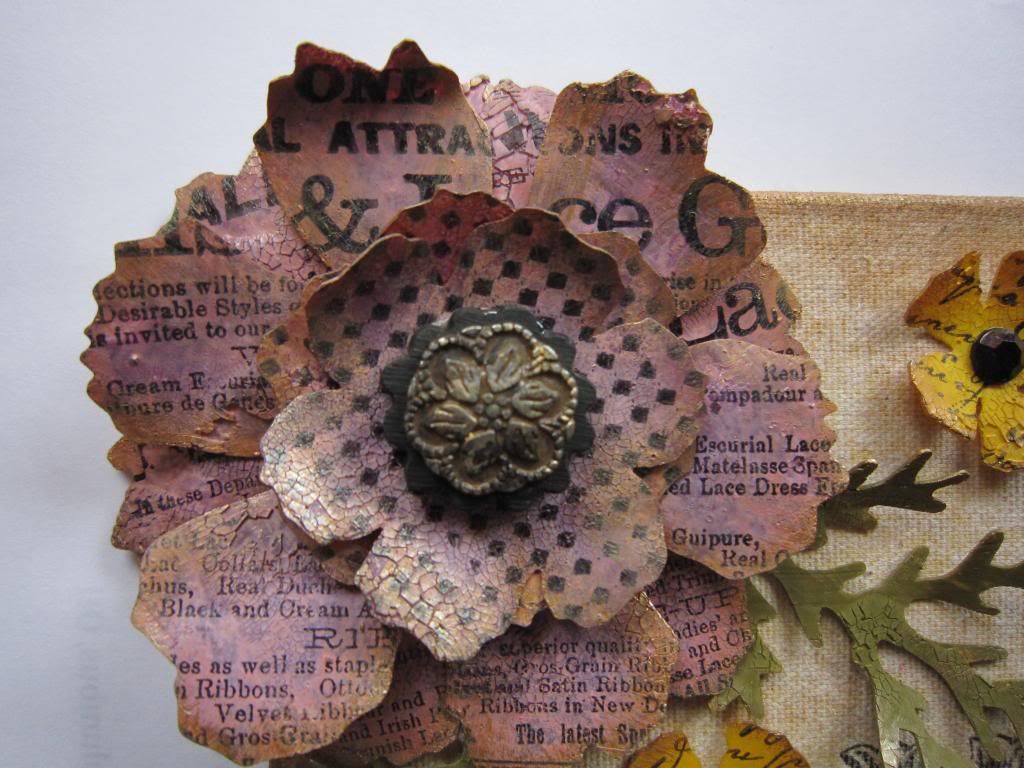


Faux Patina


Ombre (an hombre for Ombre, heheh)


Monoprint


Faded Layers (this one's for you Wendy Vecchi!!!!!)


Wednesday, October 2, 2013

Tim for Halloween!

 
This is my fav time of year for papercrafting! I love the fall colors and it's time for Halloween, too!
This tag was done following - to a point - Tim Holtz's direction for his Oct tag. I am still struggling to master using his Distress paints. It's getting better, though, and I have come to the conclusion that I use too much - less is more with them. I look forward to using them more and posting some more spooky goodness in the near future!

Friday, September 13, 2013

Got some ink on my fingers.........


..... trying a new technique! The technique is called "Faux Leather" and I had come across it on Shelly Hickox's blog while rummaging around the 'net last week. Now I had always REALLY wanted Tim's globe die, so this was the perfect opportunity to pick it up (as in buy) and use it!!!


I was amazed at how a simple, plain old brown paper bag could turn into something that looks like leather!! It was fun to follow Shelly's tutorial and get extremely inky, as when you adhere the inked up paper to make the cover, you really have to use your fingers to work the Glue and Seal (or Multi Medium) into the cracks. Fun!
 
 
I forgot (despite having a tutorial to follow, lol) to adhere the ring binder to the book before I added the inked paper. (This would then cover up the brads you use to attach it) So I instead had to fashion a book of pages of sorts. I came up with my sheet size and then by scoring the pages and glueing them together, I got ten pages.


I left some pages blank to add pictures and journaling to, then there are other that have pockets of all shapes and sizes to add keepsakes and ephemera to. A lovely little travel journal!!! And a new technique - Faux Leather - to add to my arsenal.
 
 
My friend Kay posted a challenge she entered, by Stampotique, entitled "Try a new technique." So I will enter this in their challenge no. 116. How coincidental is that?


Wednesday, March 20, 2013

Happy First Day Of Spring!

Haha, now that is a joke, because yesterday we had a bleepin' storm come through with snow, sleet, snow, rain, ice, snow, etc., etc. Phooey! Today is blustery and not what I want out of the Vernal Equinox at all.
Anywho, I have been absent from blogging for awhile - I wa actually surprised this is my first post for 2013! I have been busy horseshowing - got to Tampa, FL in early January, and then St. Louis, MO earlier this month. Still learning the buttons on my new guy, but it has been fun!
Also, we finally got the plans for the new garage, so we will be moving forward with rebuilding if and when winter ever decides to let go...
 
Ok, so for today, I was inspired by Tim Holtz and Wendy Vecchi for this project. Tim is running a Tattered Floral Challenge this month, and as I had received my full set of the new Distress Paints awhile back and hadn't used them yet, I decided to break them out. I remembered Wendy had mentioned using the paints on her Cleary For Art in one of Tim's CHA videos, so I checked out her blog and she had some pretty cool applications for it.
 
So, inspired by Wendy, here is my Tattered Floral project:


I used the Tattered Floral die for the flowers, the larger of which were cut from CFA that had been painted with both Seedless Preserves and Victorian Velvet. The smaller ones were painted with Mustard Seed. Some overstamping and inking was done also. The leaves were cut from Tim's Tattered Pinecone die and painted with Forest Moss.  The stamp set is from Stampin' Up - it's called Messages for Mom (retired). The panel I made from 3 pieces of 4 x 6 chipboard which I glued together and then covered with Claudine Hellmuth Stick-back Canvas (natural). I stained it with Antique Linen Distress Stain and then inked the edges in Vintage Photo and edged it with gold paint dabber.
 
Here's some more photos:
 

I hope you like it! Cheers 'til next time!